How to Make Your Own Coloured Glass Stepping Stones
If you would like to add a little charm to the outside of your home, a great DIY project is making your very own Stepping Stones. Stepping Stones can be used just about anywhere on your property. They can create a unique path that can lead to a shed or other building, they can be used to highlight a garden or even create a small patio or sitting area. Making your own Stepping Stones will set your home apart from many others.
Making your own Stepping Stones might seem a little complicated, but in reality they are a fun easy project that even the whole family can get involved in. Stones are relatively inexpensive to make and can be done in one day, making a perfect weekend DIY project that the whole family will enjoy.
To start you will need Mortar or Ready Mix Concrete. The size of your Stepping Stones will determine how many stones you can achieve out of a single bag of Mortar or Ready Mix Concrete. Next you will need to create a mold or form for your Stepping Stones. These can be made out of wood depending on the size in which you would want your Stepping Stone to be. The amount of wood needed will also depend on the size of the Stepping Stone as well. A good starting point would be a stone approximately 12 X 12 in dimension and about 2 inches thick. Sizes can be adjusted depending on the size you would need or desire.
To build the mold, you would take 4 pieces of wood and create a box with 12 x 12 dimensions on the interior, using a piece of plywood for the back and nail it all together. You now have your mold. A good idea is to “grease” the interior of the mold using non-petroleum grease as this would make it easier to remove your stone once it has dried.
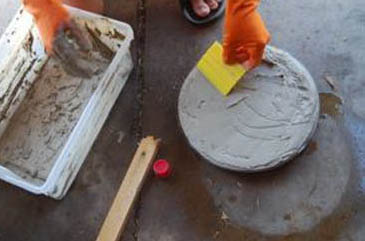
Using the Ready Mix Concrete or Mortar (using manufacturer instructions on mixing and preparing as well as safety equipment such as gloves and goggles) fill your mold until it is approximately 2 inches thick – this can be adjusted to be thicker if desired but should be NO less than 2 inches. You can ALSO use other household items to make your mold such as baking pans, hub caps, Frisbees – this list goes on and on – get creative as long as it is approximately 2 inches thick.
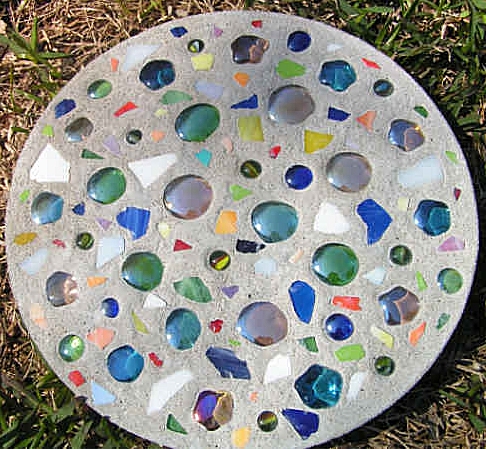
Now that you have your Stepping Stone poured in the mold, it is time to bring out your creative side and decorate it! Color glass or stones can be added to the top of the Stone while it is still wet. Other ideas would be to take a small stick and scratch in family members names, dates, handprints, footprints and such, making it like a virtual time capsule that can be seen and enjoyed for years to come! Once again, you are only limited by your imagination.
Once the Stepping Stone is dried, remove it from the mold. The mold or form can be re-used for more Stepping Stones if needed. When placing your Stones in the desired location (play with different sites), dig into your dirt about ½ to 1 inch deep and ensure that it is placed in a leveled area. Your neighbors will be sure to notice your professional looking Stepping Stones that will be the highlight of conversations in your neighborhood. Let the envy begin!